Stall Mat Installation

Barn floor preparation is one of the most important steps of the installation process. The sub-floor of your stall needs to be smooth, hard and level. Wood, concrete and asphalt all make excellent bases for rubber matting. However, most of our customers forgo the cost of these materials and choose to work from a natural base. Natural bases such as dirt, clay, or sand are not firm enough to provide the proper amount of support needed under stall matting.
You must remember that your rubber stall floor will contour to whatever is under it. “Dirt floors” have a tendency to form “soft spots” and give way under stall mats. These “soft spots” will cause the stall floor to dip or buckle making it hard to clean, damaging the mats, and leading to unsafe conditions in the stall. To prevent this from happening we suggest that the “dirt floor’ be covered with 4 to 6 inches of a crushed stone base. This base material should be a ¼” down or 3/8” minus and have a good mixture of dust. It goes under a few different names such as stone dust, road base, screenings or ¼” minus. Stone dust can be found at any local quarry and is relatively inexpensive.
Pictured above is an uneven dirt sub-floor that we found in a customer’s stall. I am sure you can see why it would not be ideal to lay your new stall flooring over this rough natural base.

Here is an example of the type of damage that a horse can do to an improperly installed stable floor. This matting was laid over the uneven dirt base previously pictured.
In many cases it will be necessary to re-level the dirt floor before adding the stone dust to the stalls. This is done with a shovel, pick axe, garden rake, and a little bit of elbow grease.

Once the dirt floor has been leveled, it is time to bring in the stone dust. The stone dust should be spread evenly across the stall floor about 4 to 6 inches deep

The stone dust can be brought into the stall using a front-end loader or a wheelbarrow.
After you have brought in your stone dust, you will want to spread it and level it using an old 2’x 4’ and a garden rake. Start at one end of the stall and drag the stone dust back towards the other wall
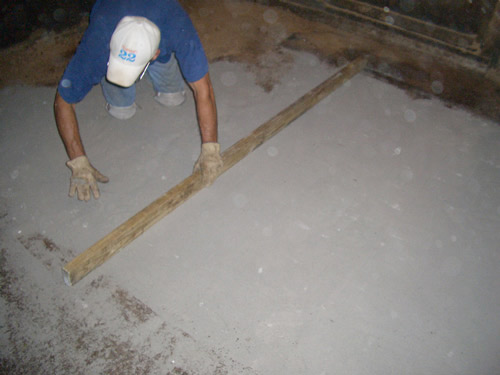
Using an old 2’x 4’ to help spread the stone dust will also show you if there are any low spots in the floor where you might need to add more of the crushed stone base.
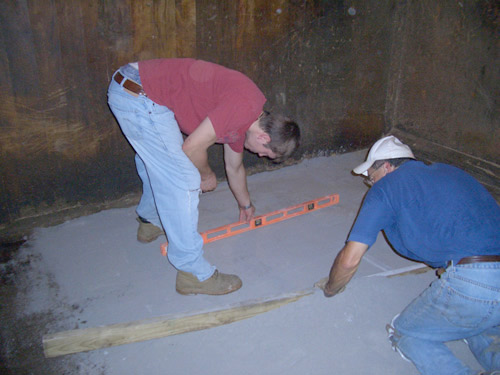
Check your sub-floor to make sure you are spreading the stone dust evenly and level.
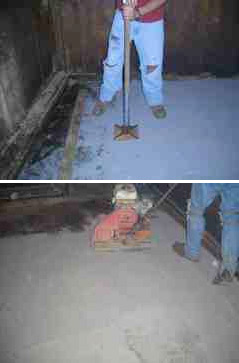
Now that the sub-floor has been covered with the stone dust it is time to tamp it down. (If the crushed stone base is extremely dry it may be necessary to wet it down first.) We suggest using a vibrator-compactor for this step. They can be rented at any local rental supply store and will save you a lot of time and labor. This machine will also make sure that the floor is evenly compacted across the entire area. A hand tamper is a great tool to have for use in the corners and other tight spots.
A finished sub-floor should be hard, smooth, and level. You should be able to walk across it without leaving a footprint.
Now that the sub-floor of your stall has been prepped, it is time to begin custom fitting the rubber matting to your stall floor. Properly fitting your new stall mat is just as important as picking the right stable flooring for your particular project. Our team here at The Rubberman.com views stall matting as an investment in your barn. This is because a correctly installed TRU-STALL or TRU-FIT floor will last 15 to 20 years.
We are committed to standing by our customers every step of the way. We are here not only to assist you in purchasing the right product, but are willing to share our combined 25+ years of experience in properly installing your new rubber matting. With this in mind, we would like to take you through the custom fitting stage of the installation step by step.
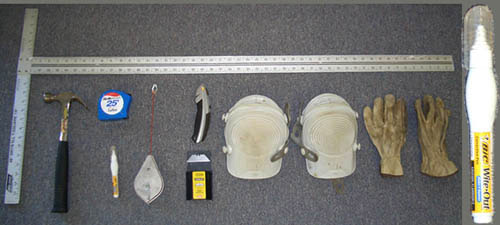
Custom Fitting your New Stall Flooring
The first step in custom fitting your new stall flooring is to assemble the proper tools. You will need a 4′ carpenter’s “T” square, hammer, tape measure, BIC White-out pen, chalk line, utility knife, heavy duty razor blades, kneepads and a pair of gloves.
These items can be purchased at any local home improvement store. Take special note of the BIC White-Out pen. We have tried using chalk among other things, but this BIC White-Out pen is best for marking on the black rubber mats. Most importantly, it washes right off leaving no mess behind.
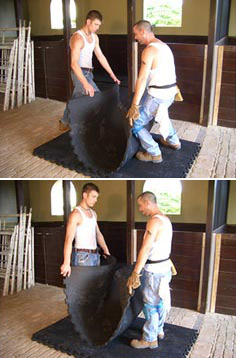
Notice how Will and Ivan have folded the mat in half and are grabbing it by the corners of the 4’ ends. They then put their knees into the mat to bow it away from themselves. Finally they lift the mat from the ground. This “bowing” technique will not only make it easier to move the mat through the stall door, but greatly reduces the amount of weight put on the individuals carrying the mats.
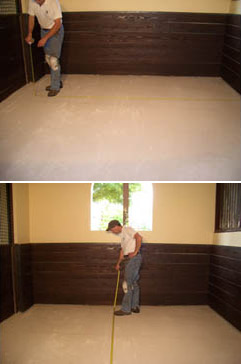
Measure twice - cut once!
The first step of course is to measure your stalls. Never guess at your stall size or take the contractor’s word for it, and by all means, never assume that all of your stalls are the same size. It is very common for us to find stalls that are out of square or vary from one side of the barn to another. Also, make sure you are measuring from the widest or longest points in the stall. You will want to allow for enough rubber to extend out into doorways and thresholds. It may be helpful to jot these measurements down on a piece of paper so you can reference them later
Measuring first will prevent you from making costly mistakes later. A properly installed stable floor should run wall to wall and fit as tight as possible. The key is to build large and cut to fit.
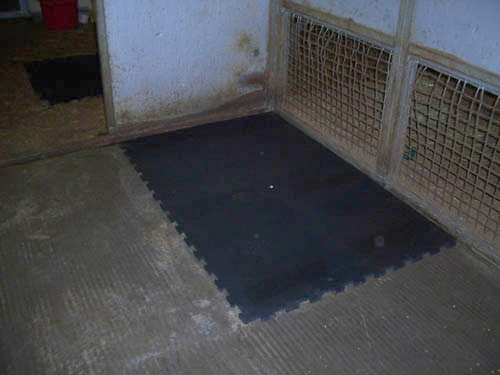
Step two is moving the first mat into place. It is always best to start along the back wall and work your way across and forward. This will insure that you are getting a tight fit in the doorways and other areas of high traffic.
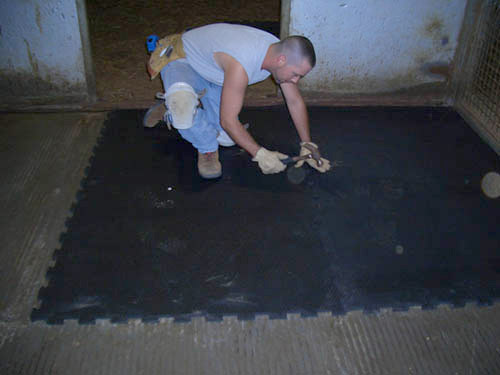
Now you can move the second mat in and interlock it to the 6’ edge of the first mat. Align the interlocking tabs and then take your hammer and tap them into place. If you are laying your matting over a stone dust floor you will want to take care not to beat on the tabs too hard. This will cause dents in the stone dust below and make it difficult to lock the mats together. Gently tapping the tabs will do.
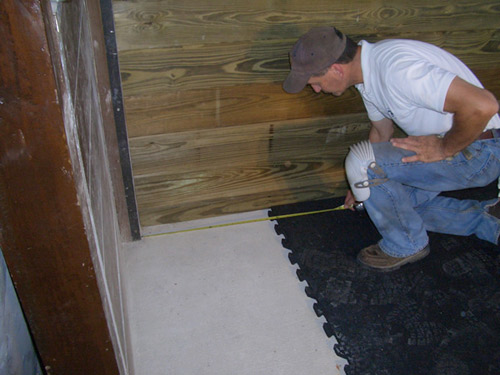
Step four is to mark your mat for cutting. Measure your mat from the male end of an interlocking tab. The more detailed you can mark your mat; the less opportunity there is to make a mistake. Use the BIC White-Out pen to “sketch” your cuts out on the stall mat. It is also a good idea to take a moment and re-check your measurements before you begin cutting.
Remember: MEASURE TWICE - CUT ONCE!
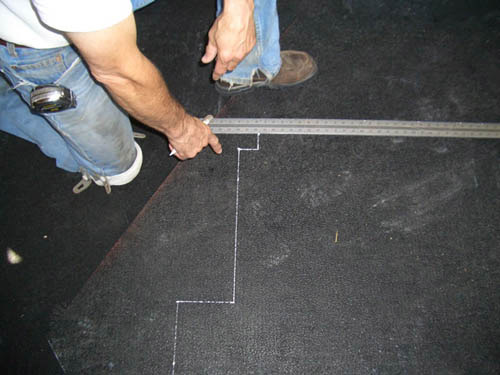
After you have your mat “sketched” out, it is time to begin cutting. Place your “T” square along the line to be cut. Put the blade of your utility knife alone the edge of the “T” square and using it as a guide, begin scoring the line to be cut with your knife. Score this line 3 to 5 times until you have cut over half way through the rubber.
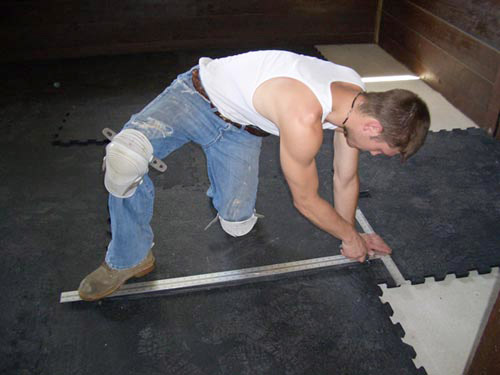
Note the position of Ivan’s hands and feet. You can either use your foot or knee to hold the end of the “T’ square in place. Your free hand should always be towards the top of the “T” square and out of the way of the knife’s blade.
Step five is to make the final cut. Fold over the piece of the mat that is being cut off and open up the seam that you created by scoring the mat. Start at the end of the mat, place the blade of your utility knife inside of the seam and continue to cut the line form one end to the other.
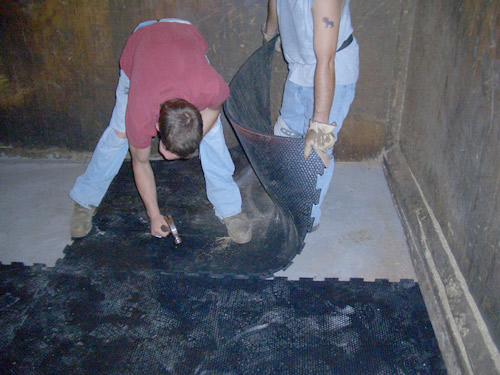
Before laying your fourth and fifth mats, be sure to take measurements from the female end of an interlocking tab to the furthest point on the wall. Take these measurements from both corners of the mat just as your did previously. If the mats need to be trimmed, you should “sketch” out your measurements on the rubber and cut them as stated above. Once this has been done, you can interlock your mats respectively.
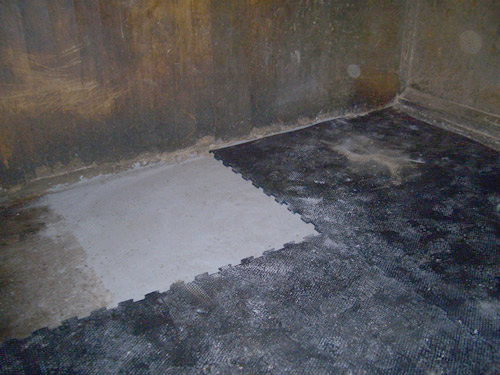
By creating this “L” shape you have given yourself points from which you can measure in both directions. This is an important step in fitting your last mat tightly into the doorway of the stall.
It is now time to address the last and most important mat, the doorway mat. When taking measurements for this stall mat you will want to allow for enough rubber to extend out into the doorway or threshold. The exposed edge of this stall mat should butt tightly up against the stall door or threshold area. Extending the rubber to this point will prevent your horse from pawing at the edge of the doorway mat.
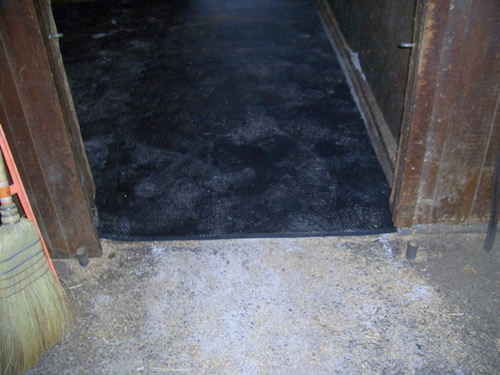
A properly installed doorway mat should extend out and tightly butt up against the stall door or threshold.
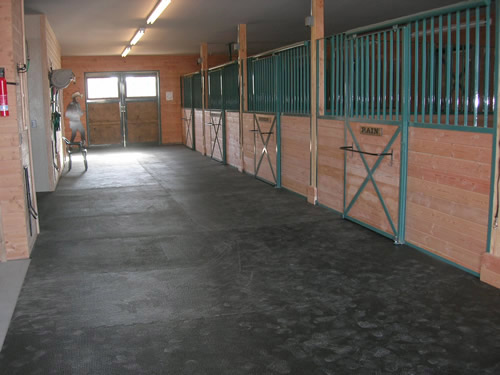
Once installed, the TRU-FIT interlocking floor appears seamless and one piece.TheRubberman.com stall flooring products and installation services have been revered by some of the most prestigious racetracks, boarders, breeders, veterinary clinics and major universities as well as many small farm owners all across the United States. Our superior knowledge of the industry, dedication to the customer service, attention to detail, and combined 25+ years of hands on experience are just a few reasons why customers return to The Rubberman.com.
Over the last decade and a half, we have assisted thousands of customers in purchasing stable flooring for their facilities. Many of these customers have even decided to partake in our Custom Fit Installation Services. Fourteen years and thousands of projects have gone by since we laid our first stall floor. I feel safe in saying that there are not any stall flooring problems or questions that we have not encountered and found a solution.
The Rubberman.com team of professional sales and installation technicians take a lot of pride in the fact that our services and products are flexible enough to cater to any size job. There is no project too big or too small. No matter if you are looking to cover one stall or a hundred; we have a floor to fit your every need.
If after reading through this you are still faced with some unanswered questions, or would like more information on our Custom Fit Installation Services, please do not hesitate in calling us right away. Alf and Will are here to serve you Monday through Friday from 8:30am to 5:30 pm EST.